As I mentioned yesterday, I'm going to show you how I created my bathroom shelves.
Before we get started, I want to acknowledge everyone who helped me. I already mentioned my parents. Wrangler Sarah and Cookie did some holding. Dana directed the leveling. And finally, these guys were there, every step of the way.

That's Selene looking at you and Curly scratching her booty. I call Curly #2, because that's what her ear tag says.
Ahem, so as I was saying yesterday, I built these shelves around the crates. So I started my measuring there.

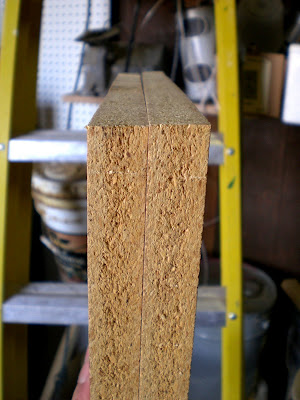
I found two long pieces of pressboard, which made me happy, because that means our shelves are smooth, instead of giving us splinters. Lord knows we get enough of those as it is!


With this length, I was able to cut 5 shelves (including the top and bottom) into 19" pieces with the circular saw.

I cheated with this picture. I was cutting the sides, because I forgot that I was going to blog this. You can see the shelves behind my leg.

Then, I took the shelves down to 18" using the table saw, so that I could square it off better. (Cam, you notice the safety glasses?)

However, please keep in mind that I'm having to freehand because on 4 of the 5 pieces, neither end is square, so I couldn't use the guide thingy on the table saw.

Which means you come out with pieces like this. Slightly uneven.
But once I got all 5 pieces, I made sure that they lined up.

Again, I'm doing some post-editing. You'll notice this picture only has 4 shelves. That's because I originally planned on leaving it open-topped, but Wrangler Sarah assured me it would look better closed. I agreed.
Once all my pieces were the same length and squared to the best of my ability. I cut two side panels to be 40", so that the shelves would all be 10" apart. Apparently most hygiene products are 9" tall...who knew?
I pre-drilled holes...

...and screwed the shelves to one side.

Then I laid the other side panel on top.

Of course, Selene was supervising.
Screwed it to the bottom shelf.

And...

Uh. Oh.
So, um. Hey, LeAndra, remember the part of the email where Dad said "EXACTLY even?" Whoops.
Oh yeah. Did I forget to tell you that I broke a drill bit in one of the shelves? And, um, I decided that it was ok for it to stay? Yeah, well it wasn't ok. It was making my shelves uneven.
Luckily, Dan pulled it out with his pliers while inspecting my work, so I was again along my merry way. And I would just like to add that he is the only man who touched the whole thing and that was the only thing he did. Thank you very much.
I would also like you to know that I did such a good job that Dan thought I made it from a kit! Little did he know I was scavenging through his scrap piles immediately upon arrival.
That pretty much fixed the gapping issue, so then I used a level to make sure the shelves weren't crooked when I screwed the second side on to the rest of the pieces.

Ahem, but as you can see here, based on the middle bubble, you have to make sure the entire shelf is on even ground or it does you no good to even use the level.
Because the shelves were still a bit wobbly and I needed a way to secure it to the wall, I added a back piece. But, again, I'm making this out of scrap wood and I don't have any more long pieces, so I had to make 3 small pieces.
First I had to take off the nice rounded edge, though.


And that's where the guide thingy came in handy.
To make the back panel, it was more measuring, cutting, pre-drilling, and screwing.

Don't forget a little turkey jealousy. They didn't want the goats to have all the fun.
And finally....
Are you ready for this?

Voila! The finished product. (It's not cracked, that's just where I couldn't cut straight.)
Please hold your applause to a dull roar. Thank you.
waaalaaa, very good! I want to see what the shelves look like up on the wall and with the buckets in them.
ReplyDeleteThis comment has been removed by the author.
ReplyDeleteHi LeAndra,
ReplyDeleteI was a nice surprise hearing from you tonight. Carol and I went to your blog and looked at all the pic's and the project you built. You did a great job on those shelves! And someday I would love to help you learn more about woodworking in my shop when you return home. It's a great feeling building something useful all by your self. I'm very proud of you! And So is Carol! Here is a link to a place I posted some of the things I built. My handle here is Woodshaver. You can look round and see things people make here. http://lumberjocks.com/galleries/woodshaver
http://lumberjocks.com/projects
Tony
Patience, young grasshopper! That will come tomorrow.
ReplyDeleteThe "guide thingy" is called a "fence". You also might have a "pusher thingy" that fits in channels and helps you cut squarely when you can't use the fence.
ReplyDeleteDad
cam approves of the safety goggles... she's more about shoes these days though. got new cinderella flip-flops today... they might even still be on her feet as she sleeps!
ReplyDelete